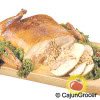
It’s a lot of fun to let your guests think you’re serving them a regular holiday turkey. When you start to carve the “turkey,” they’ll be quite surprised to see you cut through its “bones!”
Since the Turducken takes about 8 hours to cook (and then it needs to cool at least 1 hour before it’s carved), you will need to plan your time wisely. First, be sure your oven temperature control is accurate by using (or purchasing) an inexpensive oven thermometer to monitor the oven’s temperature instead of relying on the oven temperature control. Otherwise, your Turducken may take considerably less or more time than you have planned.
The quickest way to prepare your Turducken is to get friends or family members to help make the dressings and de-bone the fowl. (If you’re on your own, you will need to allow more time for preparation of the Turducken). We get letters every year from “Turducken Teams” – friends and relatives who gather together to make (and eat!) their Turduckens as a group activity! It might be fun to take pictures along the way so that you can look back and have “Turducken” memories year-round!
It’s also nice to serve additional dressing in bowls at the table, so our dressing recipe will make about 8 cups extra of each dressing. If you do not want to serve extra dressing with your Turducken, you can cut each dressing recipe in half.
If you’re inexperienced at de-boning fowl, start with the turkey; because of its size, you can more easily see the bone structure. After de-boning the turkey, the duck and chicken will go much faster. And remember, each time you do a Turducken it gets easier; it doesn’t take magical cooking abilities, it just takes care. What is magical is the way people eating your Turducken will feel about your food!
1 (15 to 20 pound) turkey
1 (5 to 6 pound) domestic duckling
1 (3 to 4 pound) chicken
Andouille Sausage Dressing (recipe follows)
Cornbread Dressing (recipe follows)
Shrimp Dressing (recipe follows)
Sweet Potato Eggplant Gravy (recipe follows)
1 (15 x 11-inch) ungreased baking pan, at least 2½” deep
6 sheet pans
3 metal or bamboo skewers
1 pan, larger than the 15 x 11-inch pan, that the smaller pan will fit inside with room to spare (NOTE: The 15 x 11-inch pan size is ideal because the Turducken fits snugly in the pan and stays in the proper shape while cooking.)
1 small hammer
STEPS FOR MAKING THE TURDUCKEN
An Important Note About Refrigeration: As you complete the steps for making the Turducken, you will be refrigerating the fowl and dressings. It is very important to keep the meats as cold as possible before preparing them, and to chill all the finished items as quickly as possible after preparing. The best way to accomplish this is to spread the prepared items (or lay them flat in the case of the de-boned fowl) on a sheet pan and place them in the coldest part of your refrigerator. While the items are chilling, keep the refrigerator door closed as much as possible.
STEPS TO BE DONE ONE DAY AHEAD
1. Prepare the Cornbread for the Cornbread Dressing
2. De-bone the turkey, chicken and duck
3. Bring the water to a simmer and prepare the Poultry Stock
4. Roast the vegetables for the Sweet Potato Eggplant Gravy
5. Prepare the Andouille Dressing
6. Prepare the Cornbread Dressing
7. Prepare the Shrimp Dressing
8. Assemble the Turducken
“TURDUCKEN” DAY!
9. Bake the Turducken
10. Prepare the Sweet Potato Eggplant Gravy
11. Let the Turducken rest for 1 hour before serving
12. While the Turducken is resting, bake the extra dressings
TURDUCKEN SHOPPING AND PREPARATION LIST
• 1 chicken (3 to 4 pound) • 7 bay leaves
• 1 duckling (5 to 6 pound) • ¾ cup corn flour
• 1 turkey, (15 to 20 pound) • 1 cup cornmeal
• 2 lbs. duck or chicken giblets • 2 tablespoons dark brown sugar
• 2½ pounds andouille sausage • 1 cup evaporated milk
• 1½ pounds shrimp, peeled • 1 cup sugar
• 9 cups celery, chopped (total) • 6 cups very fine dry breadcrumbs,
unseasoned (preferably French bread)
• 7 tablespoons garlic, minced (total) • 11 tablespoons Chef Paul Prudhomme's Magic Pepper Sauce™
• 8 cups green bell peppers, chopped • 21 tablespoons Chef Paul Prudhomme's Meat Magic ®
• 12 cups onions, chopped (total) • 4 tablespoons Chef Paul Prudhomme's Poultry Magic®
• 2 garlic heads, whole • 7 tablespoons Chef Paul Prudhomme's Seafood Magic®
• 4½ lbs. medium onions, whole (about 6) • 1 teaspoon Chef Paul Prudhomme's Vegetable Magic®
• 3 lbs. sweet potatoes, whole (about 4) • 1 (15x11-inch) baking pan, at least 2½” deep
• 2 lbs. whole eggplants (about 2) • 1 pan, larger than the 15 x 11-inch pan
• 3 whole eggs • 1 small hammer
• 2 cups heavy cream • 3 metal or bamboo skewers
• 2 cups milk • 6 sheet pans
• 5 sticks unsalted butter • vegetable oil
• 2 cups all-purpose flour • aluminum foil
• 7½ teaspoons baking powder
STEP 1. Prepare the Cornbread for the Cornbread Dressing
Sometimes people from Louisiana like their cornbread and dressing somewhat sweet. If you prefer a less sweet dressing, make your cornbread without sugar.
CORNBREAD
Makes about 9 cups crumbled
2 cups all-purpose flour
1 cup cornmeal
¾ cup corn flour (NOTE: Also available at many health and international food stores)
1 cup sugar
7½ teaspoons baking powder
1 teaspoon Chef Paul Prudhomme’s Vegetable Magic®
2 cups milk
8 tablespoons unsalted butter, melted
1 whole egg, beaten
Preheat the oven to 350°.
In a large bowl combine the flour, cornmeal, corn flour, sugar, baking powder and Vegetable Magic; mix well, breaking up any lumps. In a separate bowl combine the milk, butter and egg and add to the dry ingredients; blend just until mixed and large lumps are dissolved. Do not overbeat. Pour the mixture into a lightly oiled baking pan and bake at 350° until golden brown, about 40-55 minutes. Remove from pan, cool and break into crumbs (not too fine, and leave some coarser chunks for texture).
STEP 2. De-bone the Turkey, Chicken and Duck
NOTES ON DE-BONING:
It’s helpful to keep the following in mind:
· Your goal is to end up with one large piece of essentially boneless turkey meat; the finished product will contain only the tip end of each leg bone and the first two joints of each wing. You will end up with one piece of completely boneless duck meat and one piece of completely boneless chicken meat.
· Be careful not to pierce the skin except for the initial slits. (Cuts in the skin tend to enlarge during cooking and make the end result less attractive as well as drier.)
· Allow yourself plenty of time, especially if you’re a beginner. And even if you are experienced, approach the de-boning procedure with a gentle, careful touch - - the meat is not tough and you want to end up with as much of it as possible.
· De-bone one side of each bird - - either the left or right - - before doing the other side.
· Use a sharp knife and use mainly the tip; stay close to the bone at all times with the knife.
· It’s worth the time and effort!
TO DE-BONE THE TURKEY
Place the turkey, breast down, on a flat surface. Make an incision the entire length of the spine through the skin and flesh. Starting from the neck end and using the tip of the knife, follow as close to the bone as you can cut, carefully teasing the skin and meat away from the frame. Toward the neck end, cut through the meat to expose the shoulder blade (feel for it first and cut through small amounts of meat at a time if you have trouble locating it); cut the meat away from around the bone and sever the bone at the joint so you can remove the blade.
Disjoint the wing between the second and third joint; free the heavy drumstick of the wing and remove it, being careful to leave the skin intact. Continue teasing the meat away from the backbone, heading toward the thighbone and being careful to keep the “oyster” (pocket of meat on the back) attached to the skin instead of leaving it with the bone.
Cut through the ball-and-socket joint to release the thighbone from the carcass; you should now be able to open up the bird more in order to better see what bones are still left to deal with. Continue teasing the meat away from the carcass until you reach the center front of the breastbone. Then, very carefully separate the skin from the breastbone at the midline without piercing the skin (go slowly because the skin is very thin at this point).
Repeat the same de-boning procedure on the other side (left or right) of the turkey, with the turkey still breast down. When both sides are finished, carefully remove the carcass. Then remove the thighbone and leg bone on each side as follows. Being careful not to break through the skin, use a small hammer to break the leg bone completely across, about two inches from the tip end. Then manipulate both ends of the bone with your hands to be sure the break is complete. Leave the tip of the bone in, but remove the leg bone and thighbone as one unit. To do this, cut the meat away from around the thighbone first, using the knife tip; then, holding the thighbone up with one hand, use the other hand to carefully cut the meat away from around the leg-thigh joint. (Don’t cut through this joint, and don’t worry if it seems as if you’re leaving a lot of meat around the joint - - it can’t be helped and, besides, it will add flavor when you make the stock with the bones!) Then use the blade of the knife to scrape the meat away from the leg bone; remove the leg-thigh bone. With your hands or the knife, one by one remove as many pin bones from the leg meat as possible; then, if necessary, pull the tip of the leg bone to turn the meat to the inside (so the skin is on the outside and it looks like a turkey again). Lay the de-boned turkey on a sheet pan and immediately place in the coldest part of the refrigerator. Reserve the bones and neck for making the Poultry Stock. Reserve and refrigerate the giblets for making the Cornbread Dressing.
TO DE-BONE THE DUCK
Place the duck, breast down, on a flat surface and follow the same procedure as you did to de-bone the turkey, except this time you will remove all the bones, instead of leaving in part of the wing and leg bones. To de-bone each wing, cut off the first two joints of the wing (and save for stock), leaving the wing’s drumstick; cut the meat from around the drumstick and remove this bone. When you reach the thigh, follow the thigh-leg bone with the knife blade to release the bone as one unit, again being careful not to cut through the skin. Lay the de-boned duck on a sheet pan and immediately place in the coldest part of the refrigerator. Reserve the bones and neck for making the Poultry Stock. Reserve and refrigerate the giblets for making the Cornbread Dressing.
TO DE-BONE THE CHICKEN
Use precisely the same procedure to de-bone the chicken as you used to de-bone the duck. Lay the de-boned chicken on a sheet pan and immediately place in the coldest part of the refrigerator. Reserve the bones and neck for making the Poultry Stock. Reserve and refrigerate the giblets for making the Cornbread Dressing.
STEP 3. Bring the Water to Simmer and Prepare the Poultry Stock
POULTRY STOCK
Makes about 1 gallon
The reserved carcasses from the turkey, chicken and duck
2 gallons water (at a simmer)
In a stockpot, or other large pot, bring 2 gallons of water to a boil. When the water is boiling, reduce the heat to a slow simmer. (The water will be used for making the Poultry Stock).
Preheat the oven to 400°.
Place the reserved bones and necks in a roasting pan. Place in the oven and roast until the bones are a rich golden brown, about 30 minutes. As soon as the carcasses are browned, place them in the pot. Simmer until the stock has reduced by half and has a rich poultry flavor, about 2 - 3 hours. Strain and refrigerate until ready to use.
*Note: You will have extra stock at the end of the recipe should you need it to thin out the Sweet Potato Eggplant Gravy.
STEP 4. Roast the Vegetables for the Sweet Potato Eggplant Gravy
2 lbs. whole eggplants (about 2 whole)
4½ lbs. medium onions, whole (about 6 whole)
3 lbs. sweet potatoes, whole (about 4 whole)
6 oz. garlic, whole (about 2 whole)
Vegetable oil
Preheat the oven to 350°.
Rub all the vegetables lightly with vegetable oil. Place the oiled vegetables in a roasting pan. Place in the oven and roast until the vegetables are brown on the outside and the eggplants are deeply wrinkled, about 2½ hours. Remove the eggplants, onions and garlic and set aside to cool. Increase the oven temperature to 425° and return the sweet potatoes to the oven. Continue to roast until brown juices are beginning to come out of the potatoes, about 30 minutes.
When cool enough to handle, peel and coarsely chop the eggplants, onions and sweet potatoes. Peel the garlic and mash with a fork. Refrigerate the ingredients separately until ready to use.
STEP 5. Prepare the Andouille Dressing
ANDOUILLE SAUSAGE DRESSING
Makes about 12 cups
6 tablespoons unsalted butter, in all
2½ pounds Andouille Sausage (preferred) or other good quality smoked pork sausage, ground (8 cups) (see NOTE)
5 cups chopped onions
3 cups chopped celery
2½ cups chopped green bell peppers
¼ cup minced garlic
7 tablespoons Chef Paul Prudhomme’s Magic Pepper Sauce™
5 tablespoons Chef Paul Prudhomme’s Meat Magic®
3 cups very fine dry breadcrumbs, unseasoned
(preferably French bread)
NOTE: If you are not using andouille, add 1 to 2 more tablespoons Chef Paul Prudhomme’s Meat Magic® for a fuller flavor. Magic Seasoning Blends’ Andouille Smoked Sausage is available by calling (800) 457-2857. Overnight or 2nd day shipping required.
Melt 1 tablespoon of the butter in a 5-quart pot over high heat. When the butter is melted, add the ground andouille. Cook, stirring and scraping the bottom frequently to prevent sticking, until the andouille is beginning to brown and the oil is beginning to render from the andouille, about 6 minutes. Add the onions and cook, stirring frequently, until the onions are faded and translucent, but not brown, about 5 minutes. Add the celery, bell peppers and garlic. Continue to cook, stirring and scraping frequently, until the celery and bell peppers are faded in color, about 4 minutes. Add the Magic Pepper Sauce and Meat Magic. Stir and scrape until mixed in well and the brown crust on the bottom of the pot is dissolved. Remove the pot from the heat and add the remaining butter. Stir until the butter is melted. Fold in half of the breadcrumbs, using a bottom to top folding motion. When mixed in well, fold in the remaining breadcrumbs. Continue to fold until the breadcrumbs are evenly moistened but still somewhat dry and cakey.
Remove from heat and spread on a sheet pan as thinly as possible. Refrigerate sheet pan in the coldest part of the refrigerator until dressing is very cold. (Note: The goal is to chill the dressing as quickly as possible. Spreading the dressing in a thin layer on a sheet pan allows it to cool very quickly. In our refrigerator, this took a little over 1 hour).
STEP 6. Prepare the Cornbread Dressing
CORNBREAD DRESSING
Makes about 12 cups
1 cup evaporated milk
2 eggs
10 tablespoons unsalted butter, in all
3 bay leaves
3 cups finely chopped onions
2 cups finely chopped green bell peppers
1¾ cups finely chopped celery
1½ tablespoons minced garlic
4 tablespoons Chef Paul Prudhomme’s Poultry Magic®
4 tablespoons Chef Paul Prudhomme’s Magic Pepper Sauce™
2 lbs. duck or chicken giblets, ground
8 cups roughly crumbled Cornbread (See recipe from
STEP 1)
Process the eggs and milk together in a blender at medium speed until fully combined, about 20 seconds. Set aside.
Spread the crumbled cornbread (from STEP 1) on a sheet pan and bake in a 300° oven until the crumbs are dry and a touch of brown is showing on the larger pieces, about 30 minutes.
In a 5-quart pot, melt 6 tablespoons of butter together with the bay leaves. Add the onions. Cook, stirring frequently, until onions are beginning to brown on the edges, about 5 minutes. Add the bell peppers, celery, garlic, Poultry Magic and Magic Pepper Sauce. Cook, stirring and scraping frequently, until the onions are beginning to brown and the celery and bell peppers are faded in color, about 4 minutes. Add the giblets. Stir until the giblets are fully cooked, but not browned, and the seasoning has a rich high flavor, about 5 minutes. Add the remaining 4 tablespoons of butter and remove from the heat. Stir well until butter is melted. Remove bay leaves.
Put the baked crumbled cornbread in a large mixing bowl. Fold in the milk/egg mixture, then fold in the vegetable mixture until evenly mixed.
Spread the dressing on a sheet pan as thinly as possible. Refrigerate sheet pan in the coldest part of the refrigerator until dressing is very cold. (Note: The goal is to chill the dressing as quickly as possible. Spreading the dressing in a thin layer on a sheet pan allows it to cool very quickly. In our refrigerator, this took a little over 1 hour).
STEP 7. Prepare the Shrimp Dressing
SHRIMP DRESSING
Makes about 11 cups
8 tablespoons unsalted butter, in all
4 bay leaves
4 cups chopped onions
4 cups chopped celery
3 cups chopped green bell peppers
1 tablespoon minced garlic
7 tablespoons Chef Paul Prudhomme’s Seafood Magic®
1½ pounds shrimp, peeled and chopped
3 cups very fine dry bread crumbs, unseasoned
(preferably French bread)
1 cup Poultry Stock (see Recipe)
Melt 6 tablespoons of the butter in a 5-quart pot together with the bay leaves over high heat. When butter is melted, add the onions. Cook, stirring frequently, until onions are beginning to brown on the edges, about 5 minutes. Add the celery, bell peppers, garlic, and Seafood Magic. Cook, stirring frequently, until the celery and bell peppers are faded in color, about 4 minutes. Add the shrimp and stir in well. Add the remaining 2 tablespoons of butter and stir until butter is melted. Add half of the breadcrumbs. Cook, stirring constantly, until the breadcrumbs are fully moistened and blended in, about 2 minutes. Add the remaining breadcrumbs and continue to stir until all the breadcrumbs are mixed in, about 2 minutes. Remove from heat, pull out bay leaves and stir in the stock. The dressing should be bound and thick but not wet.
Spread the dressing on a sheet pan as thinly as possible. Refrigerate sheet pan in the coldest part of the refrigerator until dressing is very cold. (Note: The goal is to chill the dressing as quickly as possible. Spreading the dressing in a thin layer on a sheet pan allows it to cool very quickly. In our refrigerator, this took a little over 1 hour).
STEP 8. Assemble the Turducken
TURKEY: Spread the turkey, skin down, on a sheet pan exposing as much meat as possible. Sprinkle the meat generously and evenly with a total of about 4 tablespoons of the Meat Magic, patting it in with your hands. (Be sure to turn the leg, thigh and wing meat to the outside so you can season it also).
Stuff each leg cavity with about 1½ cups of the Cornbread Dressing , pressing it into the cavities with your fingers or the round handle of a wooden spoon. Pack each cavity well, but not too tightly. (If too tightly packed, it may cause the skin to burst open during cooking).
Stuff each wing cavity with about 1 cup of the Cornbread Dressing , pressing it in as before.
Fill the center of the breast cleavage with about 1 cup of the cornbread dressing. Shape the dressing with your hands to fit the space and smooth it so that it is level with the rest of the breast meat. Shape 2-3 cups of the dressing into an even layer over the remaining exposed meat , about ¾-inch thick. (Do not put any dressing over the exposed skin flap at the neck). You should use about 8 - 9 cups dressing. Return the stuffed bird to the refrigerator.
Place the remaining dressing in a baking pan. Cover with plastic or foil and refrigerate until ready to bake.

 ffended:


")