Sage herb nutrition facts
Sharply flavored, sage herb or garden sage is one of the popular pot herbs known since ancient Roman times. This legendary herb with numerous virtues, long held to be the guardian over all other herbs, has been in use in various traditional European and Chinese medicines for its health promoting and disease preventing properties.
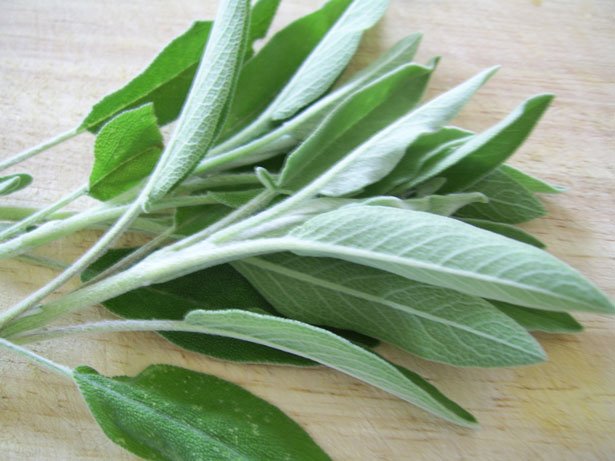
Herb sage is an evergreen perennial shrub commonly seen all over the Mediterranean and south-eastern Europe (Balkan) regions. Botanically, the plant belongs to the family of Lamiaceae, of the genus: Salvia. Scientific name: Salvia officinalis.
The plant flourishes in well-drained alkaline soil under sunny conditions. It grows up to 75 cm height and feature woody, branching stems. Its aromatic leaves are grey-green, soft and pebble-like textured with fine hair-like filaments growing on either side. It bears violet-blue color bunches of flowers in summer.
Several cultivars of sage are grown either for medicinal or for culinary purposes.
Culinary uses
Sage leaves, in general, are harvested just before flowering for culinary purposes. Discard tough stems and fibers before use in recipes. Wash in cold water to remove soil and sand. Gently pat dry using soft cloth.
Sage herb is one of the common ingredients in Greek, Italian, and Balkan cuisine.
Here are some serving tips:
Fresh leaves can be used in stuffing in season sausages, poultry and fish.
The herb is also used in many vegetable dishes, especially with beans.
It is also used as a garnish in herb salads.
Herbal tea.
Side Effects
Concern has been expressed about the internal use of sage due to the presence of thujone. Even when consumed in small amounts for long periods of time, thujone may cause increased heart rate and mental confusion. Very high amounts (several times greater than one receives if taking sage as instructed above), may lead to convulsions. If one takes sage internally, it is best to limit use to the recommended amounts and to periods of no more than one to two weeks. Extracts of sage made with alcohol are likely to be higher in thujone than those made with water. Sage oil should never be consumed without being first diluted in water. Sage should not be used internally during pregnancy. These concerns do not extend to the use of sage as a gargle or mouth rinse. Sage should be avoided when fever is present.
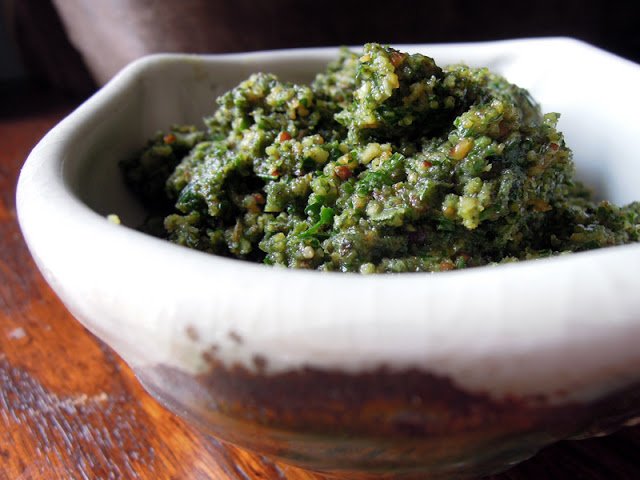
Sage Walnut Pesto
3 cloves of garlic
1/2 cup of roasted walnuts
1 cup of sage leaves
1 cup of flat Italian parsley
1/4 tsp salt and 1/4 tsp pepper
1/4 cup of extra virgin olive oil
Directions:
Mince the garlic and walnuts in a small food processor.
Add sage, parsley, salt, and pepper and blend in short bursts while pouring in the olive oil.
Fried Sage Leaves
Delicate, crunchy fried sage can be crushed and sprinkled on squash or bean soups, served as an accompaniment to burgers, and even eaten whole as a snack.
1 bunch fresh sage
1/4 cup olive oil
Coarse salt
1. Pinch off leaves from sage. Heat oil in a small skillet over medium-high heat until hot.
2. Fry 6–8 sage leaves at a time until crisp, 2–3 seconds. Transfer with a fork to paper towels and sprinkle generously with coarse salt.
Makes about 30 fried leaves.
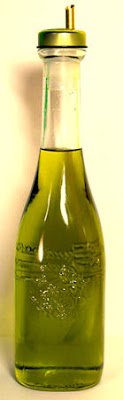
Sage oil recipe
Ingredients
2 cups cooking oil (olive oil is a good first oil to try, but any oil will do)
2 cups lightly packed sage leaves
Large glass jar with tight fitting lid
Presentation bottle or oil dispenser
30 black peppercorns (whole)
Directions
Wash and dry sage leaves, and place them in a large glass jar with a tight fitting lid.
Add 20 or so lightly crushed peppercorns to the jar.
Heat oil (see note below)
Pour oil into the jar. Make sure you add enough to cover the leaves.
(Compress leaves with a mixing spoon until they're submerged in the oil if you have to.)
Allow the oil to cool completely and secure the lid on the jar.
Place the jar in a cool, dark spot for two to three weeks. (Test after two weeks to see if the mixture is flavorful enough for your taste. Three weeks should be about the maximum.)
Shake the jar three or four times a week (whenever you think about it) during the infusion process.
After two (or three) weeks, pour the oil through a fine mesh strainer and place it in its final container with the 10 additional peppercorns.
How to Make Sage Oil - Notes and Tips:
If you don't have enough leaves, you can use sage stems. They produce a stronger and sometimes slightly more resinous flavor, though.
Harvest sage in the morning after the dew has evaporated but before noon when the sun begins to warm up your herb patch.
Rinse sage leaves thoroughly and let them dry in a single layer on paper towels.
The idea is to heat the oil just enough to encourage the sage leaves to release their native oils into the mixture. Too hot, and the oil will cook the leaves -- that's a bad thing. A temperature of around 105 degrees F/40 degrees C or slightly warmer works well.
Leaves left in the mixture will keep adding flavor intensity over time. If you remove leaves from oil after infusing, you can use them in some other dishes for taste.
Cautions for Using Sage in Herbal Preparations: It is contraindicated if you are currently taking diabetes, anticonvulsant or sedative medications. For more specifics about drug interactions involving sage, the WebMD Sage page has useful information you'll want to review: Sage Interactions:
http://www.webmd.com/vitamins-suppl...iveIngredientId=504&activeIngredientName=SAGE
Cinnamon-Sage Applesauce
Ingredients
8 tart-sweet apples (like Fuji, McIntosh, or Jonagold)
¼ cup water
½ tsp. salt
1 tsp. cinnamon
2 tbsp. maple syrup
1 tbsp. fresh sage, finely minced
Instructions
1.Wash apples, but do not peel. Chop into 1×1 inch pieces.
2.Place apple pieces in large pot and place over medium heat.
3.Add water and salt; then, bring to a boil. As soon as the pot begins to boil, reduce heat to medium-low, cover, and let simmer for thirty minutes.
4.Once apples are soft, remove pot from heat and stir in cinnamon, maple syrup, and fresh sage.
5.Transfer apple mixture to a food processor and blend until smooth, or use a hand-held electric blender to achieve the desired consistency.
Time: 1 hour
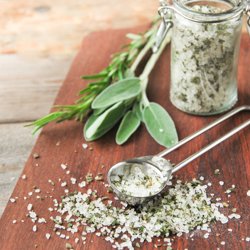
Sage salt
Ingredients
•40 grams of fresh sage leaves
•30 grams of sea salt
Pick the sage leaves from the stalks. Save the stalks to make a broth. Mix the sage with Sardinian sea salt. Try Celtic sea salt if you like. It is pale green and has a mossy flavor. Mix the sage and salt in the kitchen machine until the sage leaves dissolve into the salt. The result will be a bright green, earthy aromatic which will mellow with time.
Put the sage salt in a glass jar with a lid. Save it on a cupboard shelf that is not exposed to heat or direct sunlight. The brightness of the green will fade after a week or so into a fern color. The salt keeps well for many months.
Suggested combinations
Use sage salt as a rub for meats and fish. Sprinkle it over fresh pasta, adding a grassy olive oil and some capers. Roast pumpkin with sage salt and red pepper flakes. Toss new potatoes with it, adding lots of freshly chopped flat leaf parsley. Season grilled mushrooms with sage salt, adding a bit of truffle oil.
Notes
Save the sage stalks by wrapping them in a towel and putting them in the vegetable drawer in the refrigerator. Use a few stalks to cook a pot of beans. Make a broth with tomato and onion and add a few stalks while cooking.
Stuff a sea bass with sage stalks and garlic and grill it on the barbecue. Serve the bass with fresh corn on the cob.
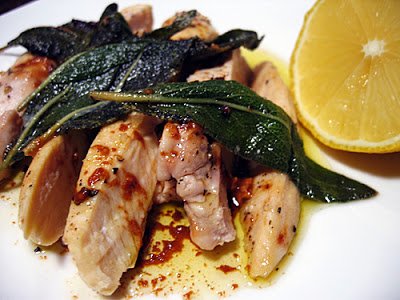
Petti di pollo alla salvia (Sauted chicken breasts with fresh sage)
1 1/2 tb butter
2 chicken breasts; skinless,
1 1/2 tb lemon juice
2 1/2 tb Extra-Virgin Olive Oil
To taste black pepper
Salt
14 Fresh sage leaves
Preparation
1. Place the chicken breasts in a glass baking dish. Add the lemon juice, 1 1/2 Tb of the oil, and the sage leaves. Turn the chicken to coat evenly, cover, and set aside at room temperature for 30 minutes.
2. Remove the chicken from the marinade and pat dry. Strain the marinade into a small bowl; reserve the sage leaves separately.
3. In a medium skillet, melt the butter in the remaining tablespoon of oil over moderately high heat until hot and bubbly. Add the chicken breasts, smooth side down, and cook until evenly browned, about 5 minutes. Turn the breasts, and season the cooked side generously with salt and pepper. Tuck the reserved sage leaves around the chicken and cook until the chicken is browned on the bottom and just white throughout but still juicy, 5 to 10 minutes more. Do not scorch the sage.
4. Remove the skillet from the heat. Transfer the chicken to a cutting board and season the bottom side with salt and pepper. Slice the chicken breasts on the diagonal into thick slices, and arrange on a warmed serving platter. Place the sage leaves over the chicken. Cover loosely with foil.
5. Discard the fat from the skillet. Heat the skillet over moderately high heat until hot. Add the reserved marinade and stir with a wooden spoon, scraping up the brown bits from the bottom of the pan. The sauce will boil almost immediately. As soon as it reduces to a brown glaze (less than 1 minute)
NOTES: This dish requires fresh sage leaves. Can substitute fresh rosemary or fresh tarragon.
Serve with lemon risotto or simple buttered pasta.
Mushroom and sage risotto
4 cups chicken broth
1 1/2 cups arborio rice
1 stick (4 ounces) butter
1 pound mushrooms, such as cremini and shiitake, sliced
1 large shallot
1/4 cup grapefruit juice
1 cup grated parmesan cheese
Grated peel and juice of 1/2 lemon
Salt
1/2 cup fresh sage leaves
1. In a saucepan, bring the broth to a boil. Add the rice; cook for 5 minutes. Drain and transfer to a bowl; return the broth to the pan and keep warm.
2. In a skillet, heat 2 tablespoons butter over medium-high heat. Add the mushrooms and cook until browned; transfer to a plate.
3. In a saucepan, melt 1 tablespoon butter over medium heat. Add the shallot and cook until softened. Add the juice and cook until the liquid has evaporated. Stir in the rice, then add the broth, a ladleful at a time, adding more as it absorbs. Cook until the rice is tender, about 10 minutes. Stir in the parmesan, 1 tablespoon butter, the mushrooms and the lemon peel; season with salt. Cover and let sit for 5 minutes.
4. Meanwhile, in a skillet, heat the remaining 4 tablespoons butter over medium heat. Stir in the sage and cook until the butter turns golden and the sage is crisp, about 5 minutes. Remove the pan from the heat and stir in the lemon juice. Serve the risotto with the toasted butter and sage.


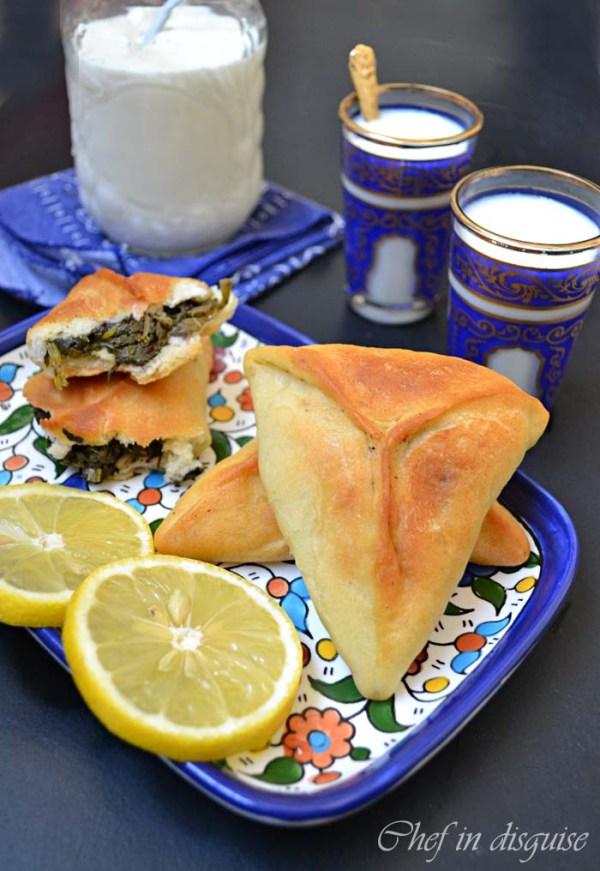
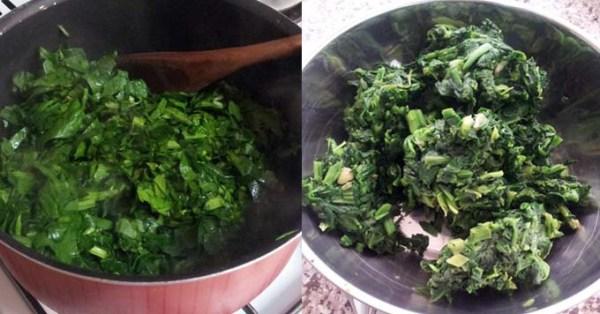
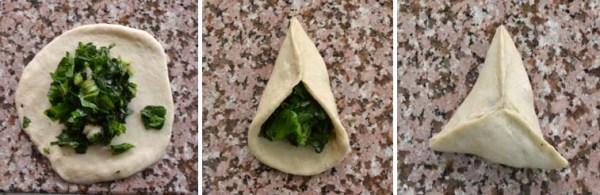
 To make the dough
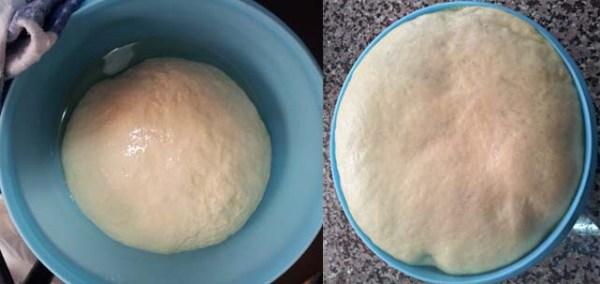

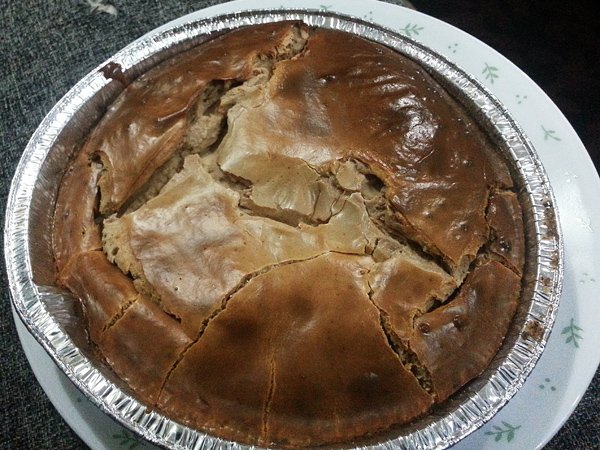
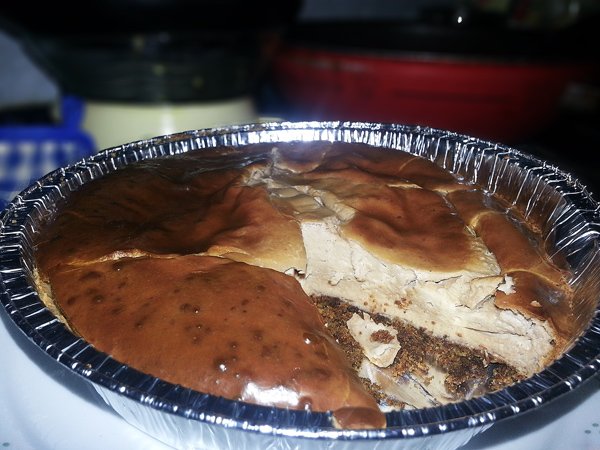
") I've never tasted it before but some of the people who I know have tasted it quite enjoy it. I've tasted brain before though, not quite a fan hehe.
I've never tasted it before but some of the people who I know have tasted it quite enjoy it. I've tasted brain before though, not quite a fan hehe.