
sister herb
IB Legend
- Messages
- 9,198
- Reaction score
- 1,026
- Gender
- Female
- Religion
- Islam
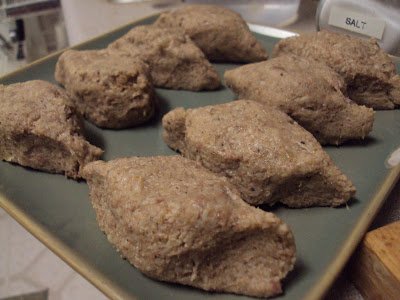
Mint Jelly Recipe
(traditional with lamb)
The tarter the apples, the more pectin they will usually have. If you are using home picked apples, earliest in the season is best, and the smaller apples will have proportionally more pectin as well.

Ingredients
4 lbs of tart apples (e.g. Granny Smith), unpeeled, chopped into big pieces, including the cores (including the cores is important as this is where most of the natural pectin is)
1 1/2 cups of fresh spearmint leaves, chopped, lightly packed
2 cups water
2 cups white vinegar
3 1/2 cups sugar (7/8 cups for each cup of juice)
Method
1 Combine apple pieces with water and mint in a large pan. Bring water to a boil then reduce heat and cook 20 minutes, until apples are soft.
2 Add vinegar, return to boil. Simmer covered, 5 more minutes.
3 Use a potato masher to mash up the apple pieces to the consistency of thin apple sauce.
4 Spoon the apple pulp into a muslin cloth (or a couple layers of cheesecloth) or a large, fine mesh sieve, suspended over a large bowl. Leave to strain for several hours. Do not squeeze. Note that if your mash is too thick, you can add 1/2 a cup to a cup more of water to it. You should have 4 to 5 cups of resulting juice.
5 Measure the juice, then pour into a large pot. Add the sugar (7/8 a cup for each cup of juice). Heat gently, stirring to make sure the sugar gets dissolved and doesn't stick to the bottom of the pan and burn.
6 Bring to a boil. Cook for 10-15 minutes, using a metal spoon to skim off the surface scum. Continue to boil until a candy thermometer
shows that the temperature has reached 8-10°F above the boiling point at your altitude (boiling point is 212°F at sea level, so at sea level the temperature should read 220-222°F). Additional time needed for cooking can be anywhere from 10 minutes to an hour or longer, depending on the amount of water, sugar, and apple pectin in the mix.
Candy thermometers aren't always the most reliable indicators of whether or not a jelly is done. Another way to test is put a half teaspoonful of the jelly on a chilled (in the freezer) plate. Allow the jelly to cool a few seconds, then push it with your fingertip. If it wrinkles up, it's ready.
7 Pour into sterilized* canning jars to within 1/4" from the top and seal.
Makes approximately 4 8-ounce jars.
*There are several ways to sterilize jars for canning. You can run the jars through a short cycle in a dishwasher. You can place the jars in a large pot (12 quart) of water on top of a steaming rack (so they don't touch the bottom of the pan), and bring the water to a boil for 10 minutes. Or you can rinse the jars, dry them, and place them, without lids, in a 200°F oven for 10 minutes.
Note: As in recipe is mentioned white vinegar, some basic information;
Distilled white vinegar, apple cider vinegar, malt vinegar, corn (Maize) sugar vinegar are considered Halal. Wine Vinegar and Balsamic vinegar are not considered Halal because of left over of wine in wine vinegar and high content sugar containing grape in Italy which in turn provide more alcohol is available to convert it to vinegar.
http://www.muslimconsumergroup.com/faq.html
(traditional with lamb)
The tarter the apples, the more pectin they will usually have. If you are using home picked apples, earliest in the season is best, and the smaller apples will have proportionally more pectin as well.
Ingredients
4 lbs of tart apples (e.g. Granny Smith), unpeeled, chopped into big pieces, including the cores (including the cores is important as this is where most of the natural pectin is)
1 1/2 cups of fresh spearmint leaves, chopped, lightly packed
2 cups water
2 cups white vinegar
3 1/2 cups sugar (7/8 cups for each cup of juice)
Method
1 Combine apple pieces with water and mint in a large pan. Bring water to a boil then reduce heat and cook 20 minutes, until apples are soft.
2 Add vinegar, return to boil. Simmer covered, 5 more minutes.
3 Use a potato masher to mash up the apple pieces to the consistency of thin apple sauce.
4 Spoon the apple pulp into a muslin cloth (or a couple layers of cheesecloth) or a large, fine mesh sieve, suspended over a large bowl. Leave to strain for several hours. Do not squeeze. Note that if your mash is too thick, you can add 1/2 a cup to a cup more of water to it. You should have 4 to 5 cups of resulting juice.
5 Measure the juice, then pour into a large pot. Add the sugar (7/8 a cup for each cup of juice). Heat gently, stirring to make sure the sugar gets dissolved and doesn't stick to the bottom of the pan and burn.
6 Bring to a boil. Cook for 10-15 minutes, using a metal spoon to skim off the surface scum. Continue to boil until a candy thermometer
shows that the temperature has reached 8-10°F above the boiling point at your altitude (boiling point is 212°F at sea level, so at sea level the temperature should read 220-222°F). Additional time needed for cooking can be anywhere from 10 minutes to an hour or longer, depending on the amount of water, sugar, and apple pectin in the mix.
Candy thermometers aren't always the most reliable indicators of whether or not a jelly is done. Another way to test is put a half teaspoonful of the jelly on a chilled (in the freezer) plate. Allow the jelly to cool a few seconds, then push it with your fingertip. If it wrinkles up, it's ready.
7 Pour into sterilized* canning jars to within 1/4" from the top and seal.
Makes approximately 4 8-ounce jars.
*There are several ways to sterilize jars for canning. You can run the jars through a short cycle in a dishwasher. You can place the jars in a large pot (12 quart) of water on top of a steaming rack (so they don't touch the bottom of the pan), and bring the water to a boil for 10 minutes. Or you can rinse the jars, dry them, and place them, without lids, in a 200°F oven for 10 minutes.
Note: As in recipe is mentioned white vinegar, some basic information;
Distilled white vinegar, apple cider vinegar, malt vinegar, corn (Maize) sugar vinegar are considered Halal. Wine Vinegar and Balsamic vinegar are not considered Halal because of left over of wine in wine vinegar and high content sugar containing grape in Italy which in turn provide more alcohol is available to convert it to vinegar.
http://www.muslimconsumergroup.com/faq.html


 :
: