IB Kitchen Club

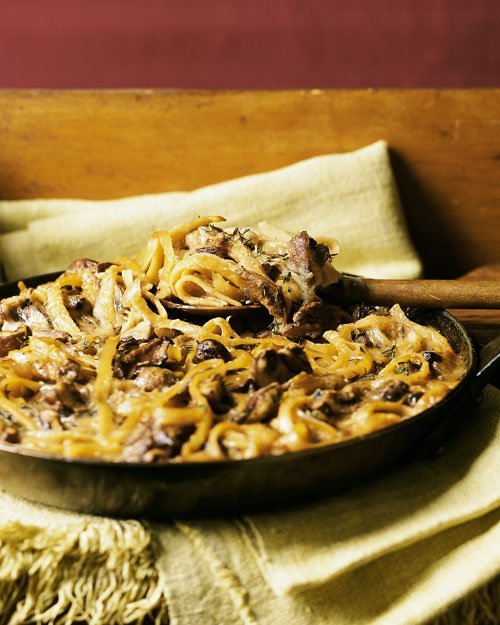
Baked Mushroom Linguine

main_01502_hd-1.jpg


Ingredients


4 ounces dried mushrooms, such as porcini or chanterelle
4 cups boiling water
2 sprigs fresh rosemary
2 sprigs fresh thyme, plus 2 teaspoons finely chopped
7 tablespoons unsalted butter
5 tablespoons all-purpose flour
1 1/2 cups heavy cream
1 onion, diced
1 pound button mushrooms, stems removed, quartered
1 pound shiitake mushrooms, stems removed, sliced
2 1/2 teaspoons coarse salt
1/2 teaspoon freshly ground pepper
1 pound linguine*
Unsalted butter, for pan
1/2 cup grated pecorino Romano cheese


Cook's Note

If you don't have a large ovenproof skillet, you can prepare the mushroom sauce in any large skillet. Cook the pasta and add it to the mushroom sauce, then transfer noodles and sauce to a buttered 9-by-13-inch baking pan, and bake.

Directions

Step 1

Place dried mushrooms in a bowl, and pour 4 cups boiling water over them. Let sit 30 minutes to allow flavors to infuse. Make a bouquet garni: Wrap rosemary and thyme sprigs in cheesecloth, and tie with kitchen twine; set aside. Lift out mushrooms with a slotted spoon, and place in another bowl. Press mushrooms to release any retained stock, and pour liquid back into bowl; set mushrooms aside. Strain mushroom liquid through a fine-mesh sieve lined with a paper towel. You should have about 4 cups of mushroom stock; set aside.


Step 2

Melt 5 tablespoons butter in a large saucepan over medium heat. When bubbling, add flour. Cook, stirring until mixture begins to brown, about 3 minutes. While whisking, slowly pour in mushroom stock. Continue cooking, whisking constantly, until the mixture bubbles and becomes thick. Stir in cream and reserved bouquet garni. Reduce to a gentle simmer, and cook 30 minutes, stirring occasionally.


Step 3

Meanwhile, in a large ovenproof skillet, heat remaining 2 tablespoons butter over medium heat. Add onion, and cook until it begins to soften, about 3 minutes. Add button mushrooms, and cook until they release their juices. Add shiitakes, reserved mushrooms, and 2 teaspoons chopped thyme, and cook until all are tender, about 5 minutes. Add cream sauce to skillet, and stir to combine. Season with salt and pepper, and set aside.


Step 4

Preheat oven to 375 degreesF/190C. Bring a large pot of water to a boil. Add pasta; cook until very al dente, 2 to 3 minutes less than manufacturer's instructions. Transfer noodles to a colander, and rinse with cold water to stop the cooking. Stir noodles into mushroom mixture. Sprinkle with grated cheese, and bake in skillet until browned on top and mixture is bubbling, about 30 minutes. Transfer dish to a wire rack to cool 5 minutes before serving.


* Linguine (Italian pronunciation: [liŋˈgwiːne], English /lɪŋˈɡwini/) is a form of pasta – flat like fettuccine and trenette. It is wider than spaghetti, about 4 mm, but not as wide as fettuccine. The name linguine means "little tongues" in Italian, where it is a plural of the feminine linguina. Linguine are also called trenette or bavette. A thinner version of linguine is called linguettine.

Linguine originated in Genoa and the Liguria region of Italy. Linguine alle vongole (linguine with clams) and Trenette al pesto are popular uses of this pasta.

While spaghetti traditionally accompanies meat and tomato dishes, linguine are often served with seafood or pesto. Linguine is typically available in both white flour and whole-wheat versions; the latter are usually made in Italy.
 
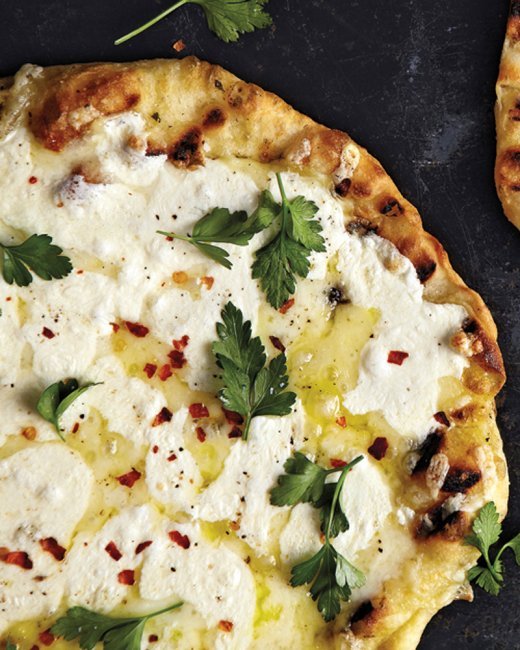
Three-Cheese Pizza

med105744_0710_piza_3_cheese_vert-1.jpg


Ingredients

•1 1/2 ounces torn fresh mozzarella
•1 ounce shredded part-skim mozzarella
•1 ounce shredded fontina
•1 tablespoon fresh parsley leaves
•Pinch of red-pepper flakes

•Basil Grilled Pizza Dough:


Ingredients


•1 teaspoon sugar
•1 packet (1/4 ounce) active dry yeast
•2 teaspoons extra-virgin olive oil, plus more for bowl and brushing
•Coarse salt and ground pepper
•2 1/4 cups bread flour or all-purpose flour, plus more for work surface

Directions

Pour 1 cup warm water into a medium bowl; add sugar and sprinkle with yeast. Let stand until foamy, 5 minutes.

Whisk oil and 1 teaspoon salt into yeast mixture. Add flour and stir with a wooden spoon until liquid is incorporated (dough will appear dry). Turn out onto a floured work surface. Knead until dough comes together in an elastic ball, 2 minutes. Transfer to an oiled medium bowl; brush lightly with oil. Cover bowl with plastic wrap; set in a warm, draft-free place until dough has doubled in bulk, 45 minutes. Punch down dough and cover; let rise another 30 minutes.

Turn out dough onto a lightly floured work surface. Divide into 4 equal pieces. Let rest 15 minutes before using.

•Herb Oil:

Ingredients


•1 sliced garlic clove
•2 teaspoons minced fresh rosemary leaves
•1/2 cup extra-virgin olive oil

Directions

In a small saucepan, bring sliced garlic clove, minced fresh rosemary leaves, and extra-virgin olive oil to a simmer over medium and cook 3 minutes. Let cool to room temperature in a small bowl.
------------------------------------------
Directions

Heat it up: Set up a grill with heat source, coals or gas, on one side over medium-high. Clean and lightly oil hot grill.

Stretch it: On a lightly floured work surface, stretch or roll 1 piece basic grilled pizza dough or 4 ounces store-bought dough into a 10-inch-long oval or other desired shape. Brush one side lightly with herb oil or olive oil and season with coarse salt and ground pepper.

Grill it: Using your hands, place dough, oiled side down, directly over heat source. Brush dough with herb oil or olive oil and cook until underside is lightly charred and bubbles form all over top, 1 to 2 minutes. With tongs, flip dough and cook until lightly charred, 1 to 2 minutes. Slide dough to cooler side of grill.

Top it: Top with cheeses, parsley, and red-pepper flakes; cover grill. Cook until cheese melts and toppings are heated through, 2 to 5 minutes.

Eat it!

Note: No grill? no problem. Cook this dough in a cast-iron skillet over high heat, or on a preheated sheet pan or pizza stone in a 500-degree F/250C oven.
 
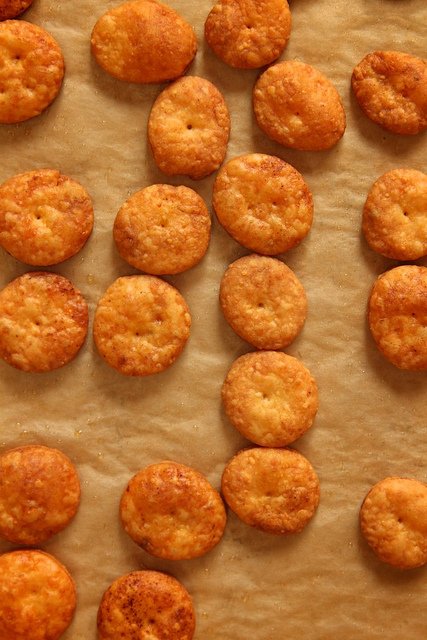
Sharp Cheddar Cheese Crackers

makes about 70 crackers

8095780250_c76bcb3a5e_z-1.jpg


4 tablespoons (1/2 stick) unsalted butter, at room temperature

8 ounces sharp cheddar cheese, finely grated

1/2 teaspoon salt

1/4 teaspoon coarsely ground black pepper

1 cup all-purpose flour

2 tablespoons cold water

For Chili Cheese Crackers (these amounts will spice half of the cracker dough) :

1/8 teaspoon garlic powder

1/4 teaspoon chili powder

1/8 teaspoon ancho chili powder

1/8 teaspoon smoked paprika

In the bowl of an electric stand mixer fitted with a paddle attachment, beat together butter, cheese, salt and pepper. It may seem strange to blend butter and cheese, but it will come together in a soft ball. With mixer on low-speed, slowly add flour. Mixture will become dry and crumbly. Add two tablespoons of water, one tablespoon at a time. Beat until mixture just comes together into a ball. The mixture may take an extra teaspoon of water, but don’t add too much. The dough should be moist but not wet.

Divide the dough in half and add chili seasoning to half of the dough. Knead the spices into the dough. Leaving streaks of the seasoning is just fine. Wrap each disk of cracker dough in plastic wrap and refrigerate for at least 30 minutes (an hour is better). The dough can also be frozen for future use.

While dough chills, place a rack in the center and upper third of the oven and preheat oven to 375 degrees F/190C. Line two baking sheets with parchment paper and set aside.

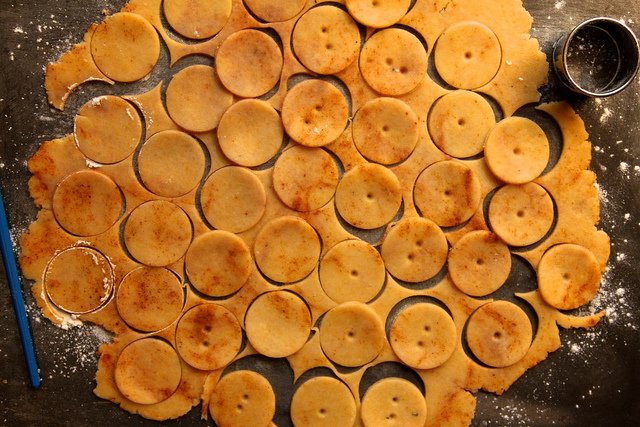
On a lightly floured work surface, roll dough very thin, about an eighth of an inch thick. Dot center of cracker with a fork or the end of a paint brush. Place crackers on prepared baking sheets. The pieces can be close together as they won’t expand much when baking. Bake for 13 to 15 minutes until fragrant, golden brown, and crisp. Allow to cool before serving.

The crackers can be stored in an airtight container for two or three days.

8095774767_bf226513b9_z-1.jpg


Source: http://joythebaker.com/2012/10/sharp-cheddar-cheese-crackers/
 
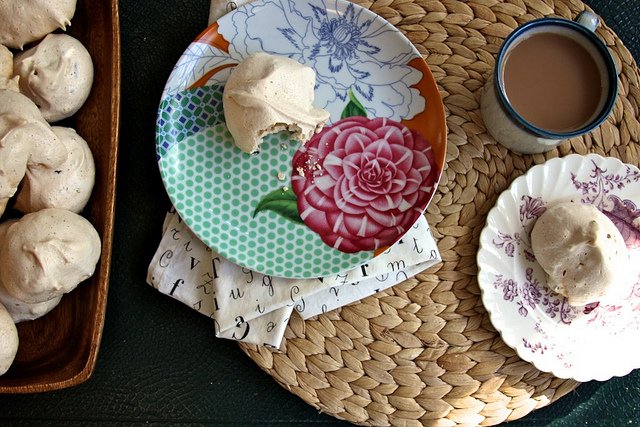
Vanilla Bean and Cocoa Nib Meringues

makes 12 cookies


6718323189_3fba7df0e0_z-1.jpg


3 large egg whites, at room temperature

pinch of salt

1/4 teaspoon cream of tartar

1 vanilla bean, split and scrapped of seeds (or 1 teaspoon pure vanilla extract)

3/4 cup granulated sugar

3 tablespoons cocoa nibs


Place a rack in the upper third of the oven and preheat oven to 275 degrees F/135C.

Line a baking sheet with parchment paper and set aside.

In a small bowl, stir together granulated sugar and vanilla bean scrapings with the back of a spoon. Press the vanilla bean scrapings into the sugar until well distributed and fragrant. Set aside.

Clean and dry the bowl of an electric stand mixer. Add egg whites and beat egg whites on medium speed until foamy. Add pinch of salt and cream of tartar. Increase speed to medium high and beat to soft peaks. The egg whites will be white and foamy, with large but tight bubbles.

Gradually add the granulated sugar, increasing the mixer speed to high. Beat for about 3 minutes on high speed, until stiff, glossy peaks form. Egg whites will be spoonable, but keep their shape when dolloped onto a baking sheet. Once thick, remove the bowl from the mixer and fold in cocoa nibs and vanilla extract (if you didn’t use vanilla bean).

On prepared baking sheet, dollop out egg white mixture by the two tablespoonful. Space about 1-inch apart, although the meringues won’t spread as they bake. Place in the oven and allow to cook for 60 to 70 minutes. Meringues will brown sightly on the top and feel hollow to the touch. Remove from the oven and allow to cool completely. Remove from the parchment and serve with coffee or mint tea.

Meringues will last, in an airtight container at room temperature, for up to 3 days.

Source (with more pictures): http://joythebaker.com/2012/01/vanilla-bean-and-cocoa-nib-meringues/
 
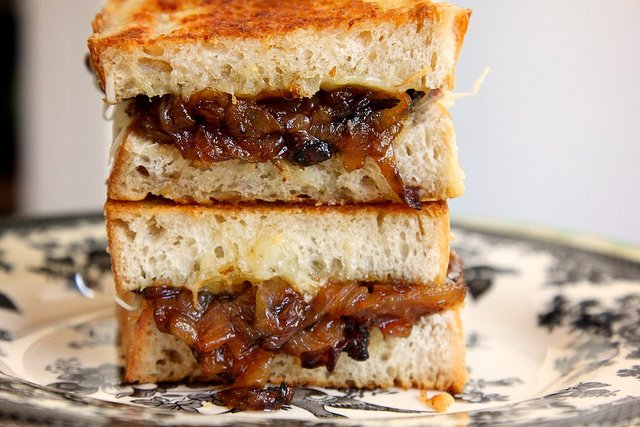
French Onion Soup Sandwiches
makes two sandwiches

7207171018_c37f034444_z-1.jpg


2 medium yellow onions, peeled cut in half and sliced into 1/4-inch thick semi-circles

3 tablespoon unsalted butter,softened, plus more for buttering the bread

1 tablespoon olive oil

1 scant teaspoon coarse sea salt

1 teaspoon fresh thyme leaves

1/2 teaspoon fresh cracked black pepper

pinch of granulated sugar

3 tablespoons beef broth to deglaze the pan

1/2 cup finely shredded Gruyere cheese, please use more cheese to your own taste

4 slices bread


Place a medium, heavy bottom sauce pan over medium heat. Add the butter and olive oil and stir until butter is melted. Add the sliced onions all at once. Stir to coat the onions in the fat. Allow onions to cook, undisturbed, for about 4 minutes. Add salt, thyme, and pepper and stir. Place lid on the pan and allow to onions to cook for about 4 minutes at a time. Lower the heat if the onions are browning too quickly. Remove the lid to stir the onions every so often. The onions will begin to brown, break down, and resemble an onion jam.

When onions are entirely browned and completely soft, add your liquid (beef broth, beer, wine, or water) to the pan. Using a wooden spoon, scrape any burned bits off the bottom of the pan as the liquid evaporates. This takes about 30 seconds. Remove pan from heat and allow to rest while you assemble the sandwiches.

Butter one side of each slice of bread. On the unbuttered side add a good sprinkling of gruyere, top with warm onion mixture, top with more cheese and the final piece of sandwich bread. Repeat process in assembling the other sandwich.

Cook sandwiches over medium heat in a medium saute pan. Flip and cook until golden on the outside and melty on the inside. Serve immediately.

Source: http://joythebaker.com/2012/05/french-onion-soup-sandwiches/
 
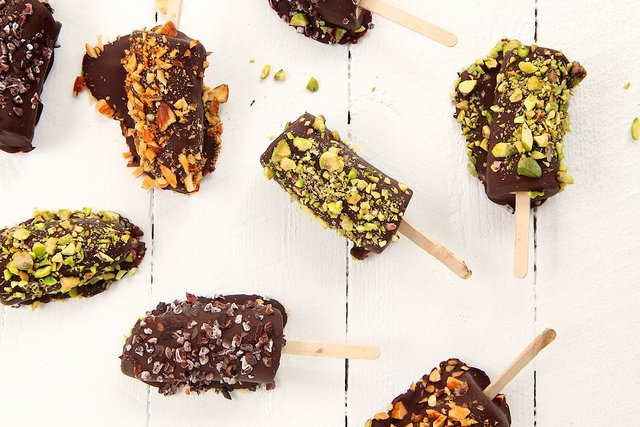
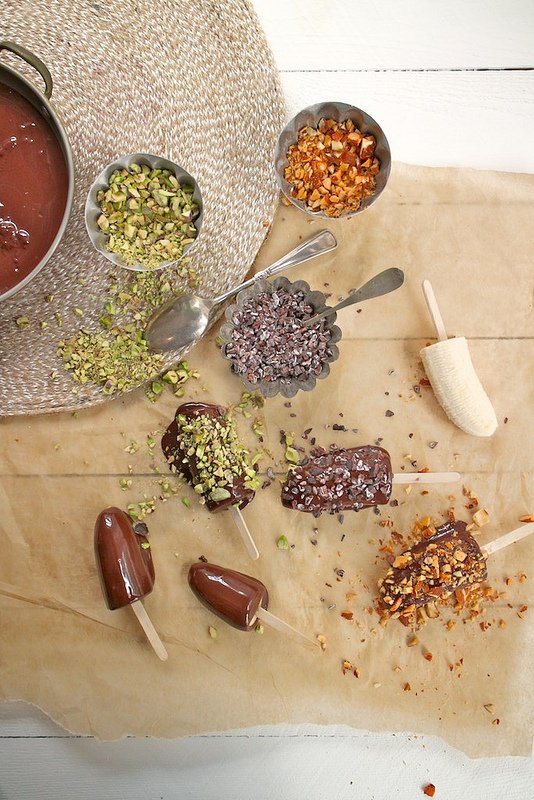
Chocolate Dipped Frozen Bananas

9388600744_4fcfb447fd_z-1.jpg


12 ounces dark chocolate, melted over a double boiler
3 large bananas, cut into thirds
popsicle sticks
chopped salted pistachios
chopped spiced or smoked almonds
cocoa nibs

Melt chocolate over a double boiler (or in the microwave, if you prefer). Stir until smooth, glossy, and entirely melted.

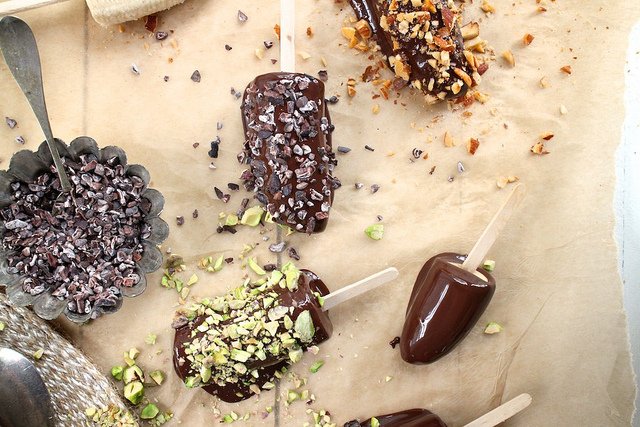
Insert a popsicle stick into one end of each banana piece. Dip each banana into the warm melted chocolate. Shake off excess chocolate as best you can. Place dipped bananas on a parchment lined baking sheet. Sprinkle generously with chopped pistachios, chopped almonds, or cocoa nibs. Place in the freezer to harden and set.

When frozen through wrap individually or enjoy immediately.

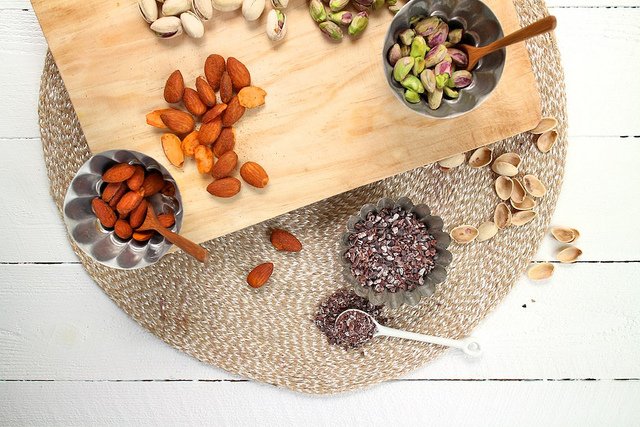
9385823423_a72a15da4e_z-1.jpg


Salted pistachios are shelled and coarsely chopped. Chili-rubbed almonds are (snacked on) and coarsely chopped. Cocoa nibs are appreciated for their dark and bitter crunch. We’re ready to sprinkle!

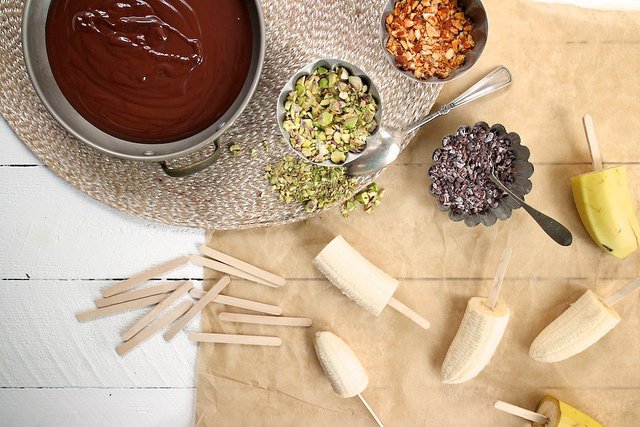
9388597298_acabd977fa_z-1.jpg


Melted chocolate is mandatory… otherwise we just have bananas on sticks, and what fun is that?

9385825679_e9f7a4c57f_c-1.jpg


Dip and sprinkle. Dip and sprinkle.

9385826673_b973677166_z-1.jpg


Source: http://joythebaker.com/2013/07/chocolate-dipped-frozen-bananas/
 
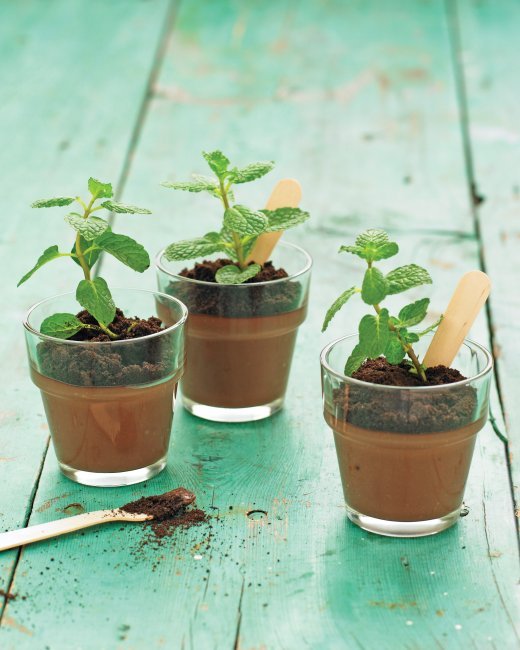
Potted Chocolate-Mint Puddings

mld106684_0311_dirtcup_338_vert-1.jpg


Mini mint puddings sprout to life, thanks to a mint "seedling" and some ground-cookie "dirt." A great way to mix cooking and gardening.

Ingredients

•1/4 cup plus 2 tablespoons sugar
•3 tablespoons cornstarch
•1 tablespoon plus 1 1/2 teaspoons unsweetened cocoa powder
•Salt
•1 1/4 cups heavy cream
•1 1/4 cups whole milk
•1/2 teaspoon pure vanilla extract
•6 ounces semisweet chocolate, chopped (1 cup)
•1/2 teaspoon pure mint extract
•1 tablespoon plus 1 1/2 teaspoons unsalted butter, cut into small pieces
•10 chocolate wafer cookies
•Garnish: mint sprigs

Directions

1. Whisk together sugar, cornstarch, cocoa, and 1/8 teaspoon salt in a medium saucepan. Combine cream, milk, and vanilla in a liquid measuring cup.

2. Pour 1 cup cream mixture into sugar mixture, and whisk until cornstarch is dissolved. Add remaining cream mixture, and whisk until smooth. Bring to a boil, whisking constantly, and cook until thick, about 5 minutes. Reduce heat to low, and add chocolate. Whisk until chocolate melts, about 1 minute.

3. Remove from heat. Add mint extract and butter, and whisk until butter melts. Quickly divide pudding, whisking as you work to prevent sides from setting up, among eight 4-ounce glasses or glass flowerpot votive candle holders, leaving about 1/2 inch of space at the top of each. Refrigerate until set, about 1 1/2 hours.

4. Just before serving, pulse cookies in a food processor until finely ground. Top each pudding with 1 tablespoon ground-cookie "dirt," and garnish with a planted mint sprig. Serve chilled.
 
Chocolate Cherry Fudge

ChocCherry-Fudge_0.jpg


8 ounces dark chocolate, chopped
1 cup walnuts, chopped
1 (14 ounces) can sweetened condensed milk
16 canned cherries (with stem)

Line an 8-inch square baking pan with parchment paper, leaving an overhang on two sides. In a large microwave-safe bowl, melt the chocolate in the condensed milk on medium-high for 4 minutes, checking at regular intervals. Stir vigorously to combine. Stir in the nuts and spread in the pan.

Lightly score the top with a knife to create squares, first in half, then quarters, eighths, and finally sixteenths. Gently press a pretty red cherry into the center of each square. Refrigerate to set. Remove the fudge from the pan by lifting it out with the paper overhang and place on a cutting board. Cut along the lines and serve.
 
Buttermints

Mints.jpg


1/2 cup (1 stick) butter, softened
1 teaspoon pure peppermint oil (or 2 teaspoons peppermint extract)
green food coloring
1 pound (about 4 cups) confectioners´ sugar

Line a few baking sheets with wax paper. Beat the softened butter with a wooden spoon, then mix in the peppermint oil and two or three drops of green or red food coloring. Don’t add any more. The mints should be pastel, not lurid.

Stir in the confectioners’ sugar, then pour the contents of the bowl onto a clean work surface and knead with your hands until a firm dough is formed. If you absolutely must, you can add up to 1 tablespoon of water, but do this a teaspoon at a time. (If you get this dough too wet, there’s no going back. Better to knead for a moment or two and see if it comes together before resorting to the water.) Continue to knead for several minutes until the dough is smooth.

Divide the dough into quarters and roll each into a ball. Set 3 dough pieces aside, covered with a sheet of plastic wrap or a damp, well-wrung-out dish towel. Halve a dough ball and roll each half out, like Play-Doh, into 2 long ropes about 1/2 inch in diameter. Use a sharp kitchen knife to cut them into 1/2-inch lengths, so each mint is a little squarish pillow, pinched at each end, and lay the cut mints on the prepared baking sheets. Continue until you’ve cut all the remaining dough.

Let the mints rest, uncovered, at room temperature for several hours until they are firm and dry to the touch, shaking the sheets now and then to roll them around so they dry on all sides. Store them in airtight tins (or plastic zip-top bags with the air pressed out, if you don’t have tins) for up to 2 weeks at room temperature, or up to 3 months in the freezer.
 
Sister herb, I love your recipes. Have you made all those things yourself?
 
^^ Most of them I have tried even once. You should have seen faces of my guests when I gave to them those "mint pots". Most of them though that they are real ones and asked a bag to take them to home, one asked if she can plants it to the garden...

;D
 
Last edited:
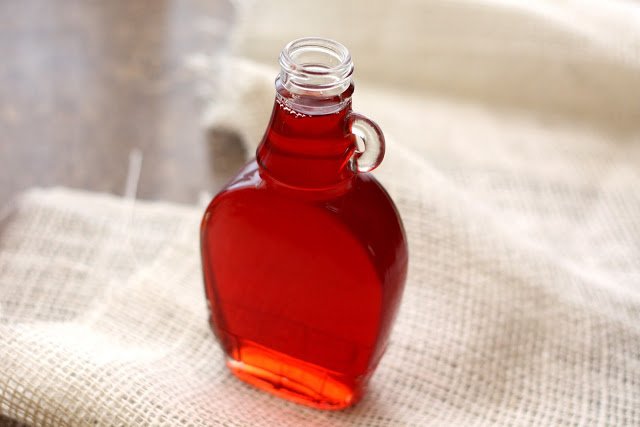
Strawberry Simple Syrup recipe

strawberrysimplesyrup4-1.jpg


Yield: about 3 1/2 cups

2 lbs fresh strawberries
4 cups water
2 cups sugar


Wash the berries and remove stems. Roughly chop or quarter the strawberries and place them into a medium saucepan. Cover with the water and bring to a boil. Reduce to a simmer and cook the berries for 20 minutes. Carefully skim and discard any foam that rises to the top.

After 20 minutes, the berries will be much lighter in color and the water should be a dark pink or red. Place a fine mesh strainer over a second saucepan and pour the strawberry liquid through it. Resist the temptation to press down on the cooked berries to extract more juice. This will make the syrup cloudy. After straining, discard the cooked berries.

Add the sugar to the liquid and bring back to a boil. Stir constantly, until the sugar has dissolved completely.* Skim and discard any foam that rises to the top. Remove from the heat and let the syrup cool completely before transferring to glass jars for storage in the refrigerator. The syrup will last for several weeks.


* If you want a thicker syrup for a topping on pancakes, ice cream or other desserts, simmer the syrup for 5-10 minutes longer until the liquid reduces and thickens further.
 
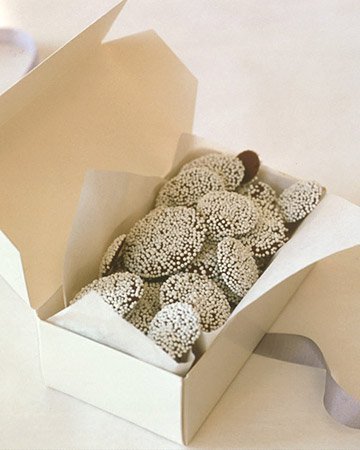
Nonpareils Candies


candy_00187_xl-1.jpg


Ingredients
•8 ounces bittersweet chocolate
•1/2 teaspoon pure vegetable shortening
•1/4 cup white or colored sugar beads

Directions

Line a baking sheet with parchment paper. In the top of a double boiler or in a heat-proof bowl set over a pan of simmering water, melt the chocolate and shortening, stirring with a rubber spatula until smooth.

Spoon the melted chocolate in nickel-size circles onto prepared baking sheet. Cool for 20 minutes; sprinkle with sugar beads. Let nonpareils harden in a cool place for 4 hours before serving.


Source: http://www.marthastewart.com/332774...pes&gallery=875794&slide=332774&center=874882
 
Cheddar Crackers

Cheddarcrackers108JPG-1.jpg


1 cup all-purpose flour(can use whole wheat for healthier alternative)
3/4 tsp. salt
1/2 tsp. ground pepper (optional)
4 TBSP cold unsalted butter, cut into small pieces
8 ounces grated cheddar cheese
3-4 TBSP water

Directions

Pulse the flour, salt and pepper, then add butter and pulse until the mixture resembles coarse meal. Add grated cheese a little at a time until the mixture again resembles coarse meal.

Pulse in 3 to 4 tablespoons of water, one tablespoon at a time, until the dough forms into a ball. It will probably take a minute or so.

Remove, wrap in plastic, and chill for 20 minutes or up to 24 hours. This way the butter has time to solidify and it makes for puffier crackers.

Roll the dough out to 1/8th-inch thickness directly onto a baking sheet. You don't want to roll them paper thin, neither do you want to roll them too thick. If they are too thin, they will not puff up as much. If they are too thick, they will not be as crispy.

Using a knife or pizza cutter, cut 1 inch squares.

Bake at 350° F/175C for 15-20 minutes or until crackers are golden brown. Watch them after the 10 minute mark.

Source: http://homecookinginmontana.blogspot.fi/2010/02/cheddar-crackersreminiscent-of-goldfish.html
 
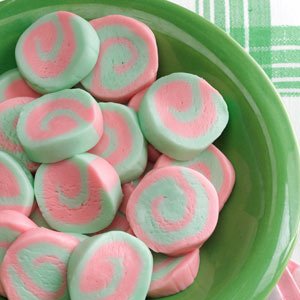
Pinwheel Mints

exps32223_CK133085B06_18_4b-1.jpg


1 package (8 ounces) PHILADELPHIA Cream Cheese, softened
•1/2 to 1 teaspoon mint extract
•7-1/2 to 8-1/2 cups confectioners' sugar
•Red and green food coloring
•Additional confectioners' sugar


1.In a large bowl, beat cream cheese and extract until smooth. Gradually beat in as much confectioners' sugar as possible.
2.Turn onto a work surface dusted with confectioners' sugar; knead in remaining confectioners' sugar until smooth and sugar is absorbed (mixture will be stiff). Divide mixture in half. Using food coloring, tint one portion pink and the other portion light green, kneading until blended.
3.Divide each portion in half; shape each half into a 10-in. log to make two pink logs and two green logs. Place one log on a 12-in. piece of waxed paper lightly dusted with confectioners' sugar. Flatten log slightly; cover with a second piece of waxed paper. Roll out candy mixture into a 12-in. x 5-in. rectangle. Repeat with remaining logs.
4.Remove top sheet of waxed paper from one pink and one green rectangle. Place one rectangle over the other. Roll up jelly-roll style, starting with a long side. Wrap in waxed paper; twist ends. Repeat with remaining rectangles. Chill overnight.
5.To serve, cut candy into 1/2-in. slices. Store in an airtight container in the refrigerator for up to 1 week. Yield: about 3 dozen.
 
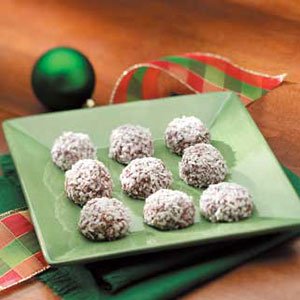
Coconut Chocolate Creams

exps19588_RDHE10671D49A_WEB-1.jpg


2-1/2 cups flaked coconut
1 cup (6 ounces) semisweet chocolate chips
1/2 cup evaporated milk
2-1/2 cups confectioners' sugar
1/3 cup pecans
1/3 cup chopped maraschino cherries


1.Place coconut in a blender; cover and process until finely chopped. In a microwave-safe bowl, melt chocolate chips and milk; stir until smooth. Stir in the confectioners' sugar, 1-1/4 cups coconut, pecans and cherries. Cover and refrigerate for 2 hours or until firm. Set remaining coconut aside.
2.Shape chocolate mixture into 1-in. balls; roll in reserved coconut. Place on waxed paper-lined baking sheets. Refrigerate for 2 hours or until firm. Store in an airtight container in the refrigerator. Yield: about 3 dozen.
 
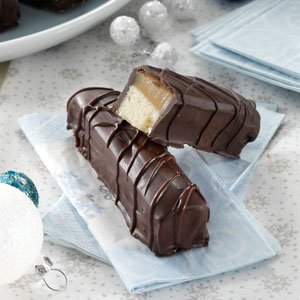
Caramel Cookie Candy Recipe

exps49838_THCA2449046C01_26_4b-1.jpg


TOTAL TIME: Prep: 45 min. Cook: 30 min. + chilling

MAKES: 48 servings

Ingredients

2 teaspoons plus 2/3 cup butter, softened, divided
3/4 cup confectioners' sugar
1 egg
1-1/2 teaspoons vanilla extract
2 cups all-purpose flour
1/2 teaspoon baking powder
1/2 teaspoon salt

CARAMEL LAYER:
1 cup sugar
1 cup corn syrup
1 cup butter, cubed
1 can (14 ounces) sweetened condensed milk
1 teaspoon vanilla extract
2-1/2 pounds dark chocolate candy coating

Directions

1.Preheat oven to 375°F. Line a 13-in. x 9-in. pan with foil and grease the foil with 2 teaspoons butter; set aside.

2. In a large bowl, cream confectioners' sugar and remaining butter until light and fluffy. Beat in egg and vanilla. Combine the flour, baking powder and salt; gradually add to creamed mixture and mix well. Press dough into prepared pan. Bake 16-20 minutes or until lightly browned. Cool on a wire rack.

3. For caramel, combine sugar, corn syrup and butter in a large saucepan. Bring to a boil over medium heat, stirring constantly. Boil gently for 4 minutes without stirring. Remove from heat; gradually stir in milk.

4. Reduce heat to medium-low and cook until a candy thermometer reads 238°F (soft-ball stage), stirring constantly. Remove from heat; stir in vanilla. Pour over prepared crust. Refrigerate 2 hours or until caramel is set.

5. Using foil, lift candy out of pan. Gently peel off foil; cut into 3-1/4x3/4-in. bars. In a microwave, melt candy coating; stir until smooth. Dip bars in chocolate; allow excess to drip off. Place on a waxed paper-lined sheet; refrigerate until set. Store in an airtight container.

Yield: 4 dozen.

Editor's Note: We recommend that you test your candy thermometer before each use by bringing water to a boil; the thermometer should read 212°F. Adjust your recipe temperature up or down based on your test.

Source: http://www.tasteofhome.com/recipes/caramel-cookie-candy
 
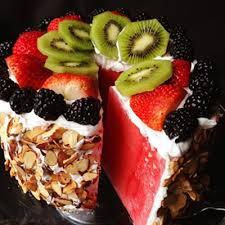
No-Bake Watermelon Cake

imagesqtbnANd9GcSMVVhnXAKQWFXPKboOZQ7jtc-1.jpg


1. You’ll need a good sized watermelon.

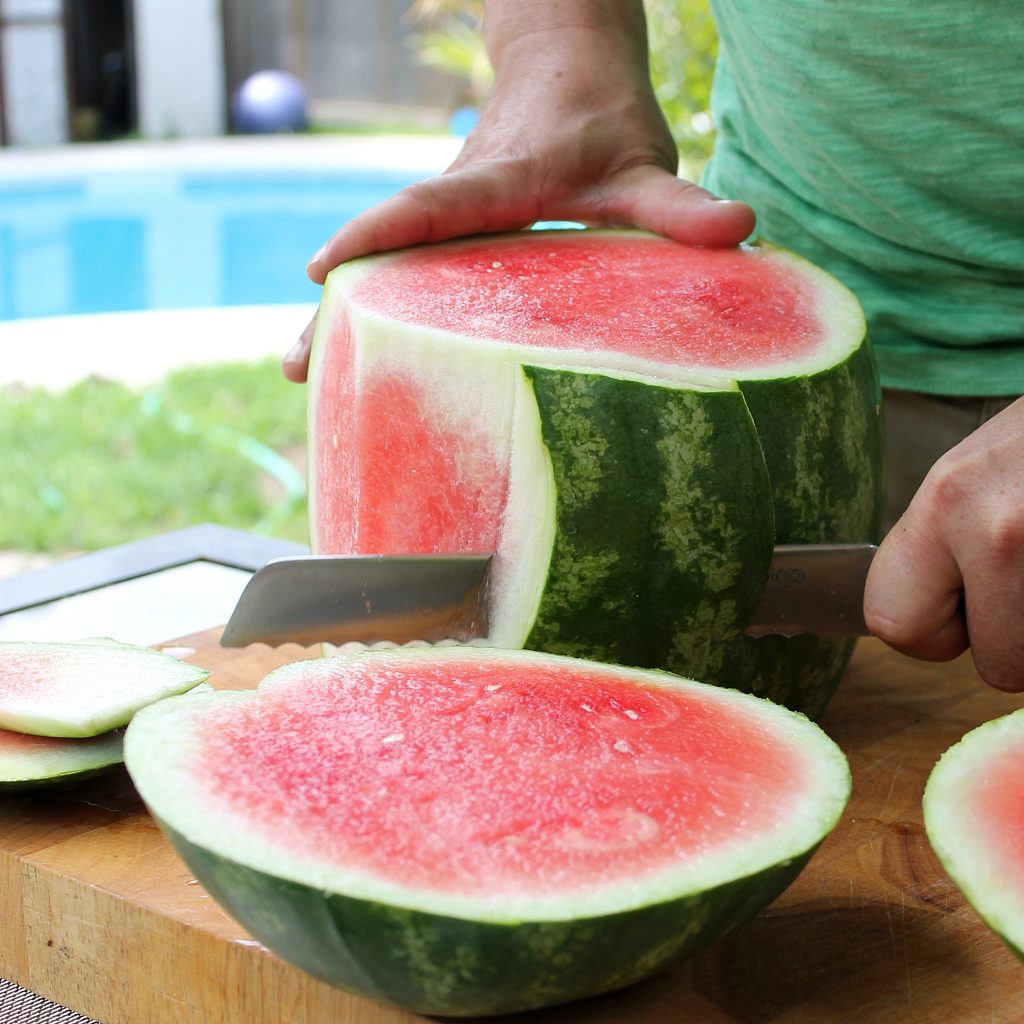
2. Cut off each end of the watermelon.

3. You’ll be left with the center and now you cut off the skin and white bits.

WatermelonCakeRemoveSkin1024x1024-1.jpg


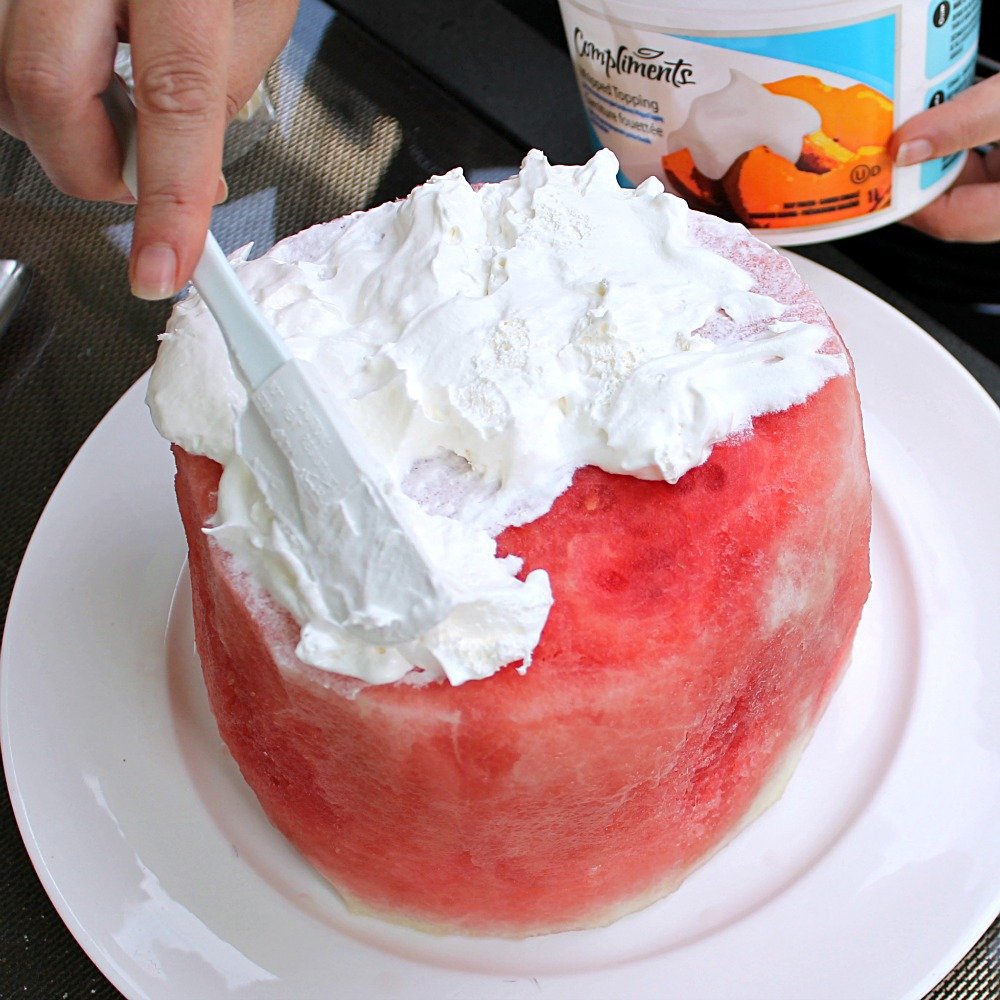
4. Cover the entire watermelon in whipped cream as if you’re icing a cake.

WatermelonCakePuttingOnIceCream-1.jpg


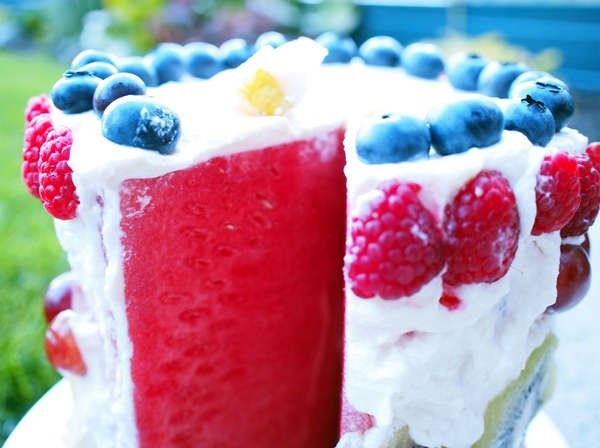
5. Now you simply add your choice of decorations. You can use fruits, berries, chocolate chips, chopped nuts...

nobakewatermeloncakecollage-1.jpg


watermeloncakebymikewarren-1.jpeg
 
Mexican Espresso Brownies with an Espresso Chocolate Glaze

browniesmexicanscene-1.jpg


For the Brownies:

1/3 cup cocoa
1 & 1/2 tsp espresso
1/2 cup and 2 Tbsp boiling water
2 oz chopped unsweetened chocolate
4 & 1/2 Tbsp melted butter
1/2 cup + 2 Tbsp vegetable oil
2 eggs and 2 egg yolks
2 tsp vanilla
1 cup granulated sugar
1 & 1/2 cup brown sugar
1 tsp cinnamon
3/4 tsp salt
1 & 3/4 cup flour
6 oz chopped chocolate or chocolate chips

For the Espresso Glaze:

6 Tbsp Butter
1/3 cup buttermilk
1/4 cup cocoa
1 Tbsp espresso powder
1/2 tsp cinnamon
16 oz powdered sugar
1 tsp vanilla extract

Preparation

1. Preheat the oven to 350 degrees F/175 C.

2. Put the 1/3 cup cocoa and 1 & 1/2 tsp espresso into a medium size mixing bowl; add the boiling water and blend thoroughly with a whisk.Add the 2 oz of chopped unsweetened chocolate and whisk until melted.

3. Add the butter and the vegetable oil and whisk until combined.Add the 2 eggs and 2 egg yolks and whisk until just combined then add the vanilla, sugars, cinnamon and salt and whisk.

4. Fold in the flour until just mixed and then mix in the 6 oz of chocolate.

5. Cover the inside of a 9X13" pan with aluminum foil and butter the inside. Pour the dough into the pan and cook for 30 minutes or until a toothpick inserted in the middle comes out clean.

To Make the Glaze:

6. Combine the butter, buttermilk, cocoa, espresso and cinnamon in medium size pan and bring to a boil on the stove. Remove from heat and add the powdered sugar and vanilla and beat with a whisk until smooth.

7. Remove the brownies from the oven and immediately pour the glaze over the top and spread. Cool the brownies completely at room temperature. then remove them from the pan using the foil edges. Allow to cool for 90 minutes minimum.

8. Cut. Devour.
 
Pumpkin Sage Biscuits

sagebiscuits-1.jpg


2 cups all-purpose flour (plus more for rolling)
1 Tablespoon light brown sugar
2 1/2 tsp baking powder
1 1/2 tsp kosher salt
1/2 tsp baking soda
6 fresh sage leaves, finely chopped (this is half of original recipe so double if you want more sage flavor)
6 Tablespoons butter, cold and cut into small cubes
1/3 cup buttermilk, cold and well-shaken
3/4 cup pumpkin puree
1 Tbsp butter, melted

Preheat the oven to 425 degrees F/220C.

Line a 9 inch round pan with parchment paper or spray it with cooking spray; I used a springform pan and it was the perfect size.

In the bowl of an electric mixer, stir together the flour, brown sugar, baking powder, salt and baking soda to combine.

Lightly stir in the chopped sage.

Drop the cubes of cold butter into the flour and with the paddle attachment, blend on low speed until the mixture looks like coarse meal, with a few pieces of butter still visible.

In a small bowl, whisk together the buttermilk and pumpkin puree. Add to the flour mixture and blend until the dough just comes together. If the dough is too moist, add a bit more flour and mix until not sticky.

Pat or roll dough to a thickness of 1/2 inch. Cut with 2" biscuit cutters; re-rolling one time after the first cut.

You should get 10 biscuits that should fit into the 9" pan comfortably.

Bake for 10 minutes, remove from the oven and brush the melted butter on top of each biscuit.

Return to the oven for another 2 minutes and bake until risen and lightly golden.

Serve with the butter or with Sage and Caramelized Shallot Brown Butter

6 oz butter, divided
2 shallots
6 fresh sage leaves

1.Put 4 oz of butter into a small saucepan; heat on medium heat until a foam appears on the top. Watch carefully until the butter solids turn brown.

2.Add the minced shallots to the butter and cook on low heat for a minute or two until starting to turn brown.

3.Remove the butter from the stove, pour into a bowl and refrigerate until solid.

4.Put onion butter and another 2 oz of butter into a processor and pulse until mixed and smooth. Remove to a clean bowl, add the chopped sage, mix thoroughly and return the butter to the refrigerator to keep firm until ready for serving.

Notes

The biscuits will keep in an airtight container for 2 days, or you can make the dough, pat it out, wrap it in plastic and refrigerate overnight. Cut and bake the next day.

Source: http://www.creative-culinary.com/sage-compound-butter-and-pumpkin-biscuits/
 

Similar Threads

Back
Top